Introduction to RV Rear Camera Systems
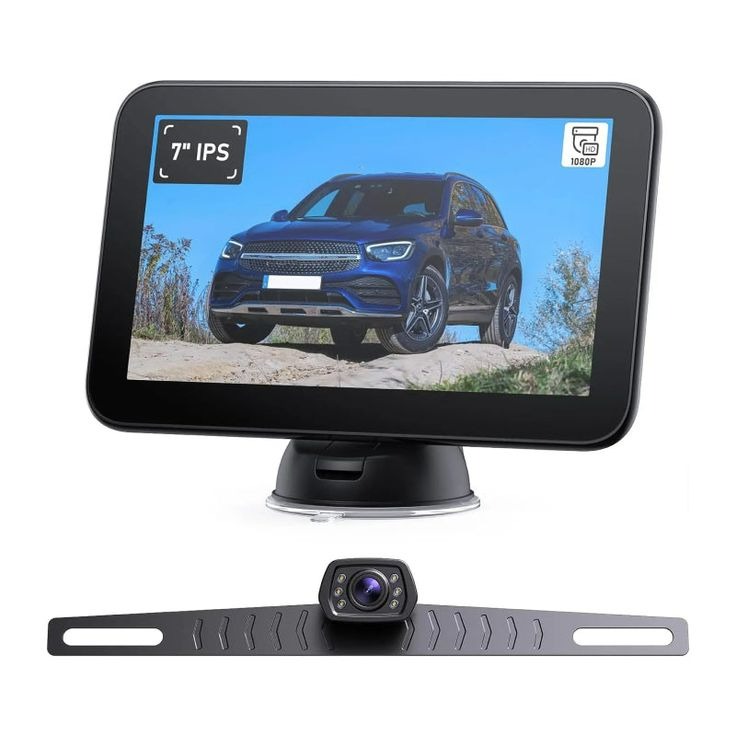
RV rear camera systems are essential for safe travel. They give a clear view of what’s behind your vehicle. With an RV rear camera, reversing is easier and safer. These systems help avoid accidents and damage to your RV. They fit most RVs and come in various models. Some have night vision, others have wide-angle lenses. A good system can also help with hitching trailers. The key is to find the right camera for your specific RV needs. Look for features like image quality and field of view. RV rear camera systems are an investment in safety and convenience.
Benefits of Installing a Rear Camera on Your RV
Installing an RV rear camera boasts several benefits. Here are some reasons to consider adding one to your RV:
- Enhanced Safety: The primary advantage is increased safety. A camera provides a clear view of what is behind your rig, reducing the risk of back-over accidents. It can be especially helpful when backing into tight spots or navigating through campgrounds.
- Easier Reversing: Reversing a large vehicle like an RV can be daunting. An RV rear camera makes this task less stressful by eliminating blind spots and giving you more confidence while maneuvering.
- Prevents Damage: Without a rear view, it’s easy to hit obstacles that can cause costly damage to your RV. A camera helps you see those hidden dangers and avoid unwanted repairs.
- Assists with Hitching: If you tow a vehicle or trailer, a rear camera can be a game-changer. It simplifies the process of aligning your RV with the hitch, saving time and frustration.
- Increases Resale Value: Should you decide to sell your RV, having a rear camera installed could increase its market value. It’s a feature many RVers look for in a pre-owned vehicle.
- Added Convenience: Some rear camera systems provide continuous monitoring, not just while reversing. This continuous feed can give you peace of mind while on the road, ensuring everything is safe and secure.
- Wider Field of View: Many RV rear cameras offer a wide-angle view. This extended perspective can help navigate difficult driving conditions and improve overall road awareness.
In conclusion, adding an RV rear camera system is a smart choice for any RVer. It enhances safety, simplifies driving, and adds value to your vehicle. Remember to choose a system that suits your RV needs to get the most out of this investment.
Choosing the Right RV Rear Camera
When it comes to selecting the perfect RV rear camera, several factors come into play. The choice you make should align with the unique needs of your vehicle and your driving habits. Factors to consider include:
- Camera Quality: High-resolution cameras offer clearer images, making it easier to spot obstacles. Opt for cameras that deliver good image quality, even in low light.
- Field of Vision: A wider field of vision aids in capturing more area behind your RV. Cameras with a broad view range help in avoiding blind spots.
- Installation Ease: Some cameras are easier to install than others. Consider how involved the installation process is and whether you can do it yourself or if professional help is needed.
- Durability: RV rear cameras should withstand various weather conditions. Look for waterproof and dust-resistant models for longevity.
- Features: Additional features like night vision, motion sensors, and built-in microphones can be beneficial. Decide which features add value to your driving experience.
- Compatibility: Ensure the camera system is compatible with your RV. Some may require specific mounting brackets or wiring kits.
- Budget: Cameras come at different price points. Balance cost with the quality and features you need.
By considering these factors, you’ll be well-equipped to choose an RV rear camera that enhances safety and suits your travel needs. Don’t rush your decision; take the time to research what’s available and what works best for your RV.
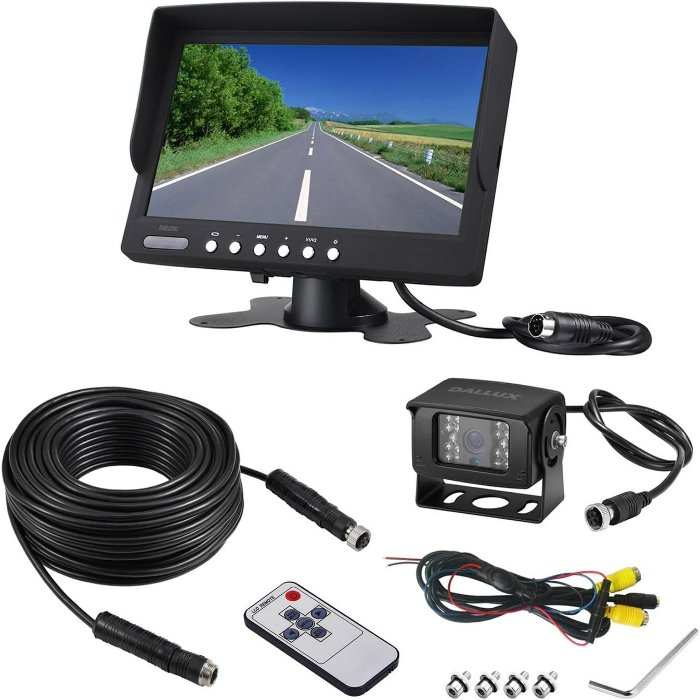
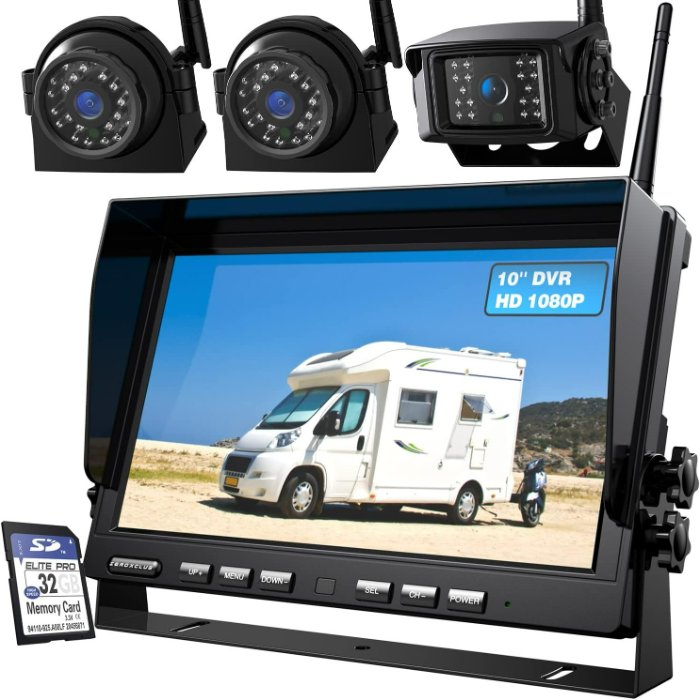
Tools and Materials Needed for Installation
Before installing your RV rear camera, gather the right tools and materials. Proper preparation will make the process smoother. Here’s a list of what you’ll need:
- Screwdriver Set: For mounting the camera and screen.
- Drill with Bits: To make holes for wires or mounting screws.
- Wire Strippers and Crimpers: Essential for handling the wiring.
- RV Rear Camera Kit: Includes the camera and necessary hardware.
- Silicone Sealant: To waterproof any exterior drill holes.
- Cable Ties: To secure wires and keep them neat.
- Electrical Tape: For insulating any electrical connections.
- Fuse Tap or Add-A-Circuit: For a clean power source connection.
- Voltmeter: To test electrical connections.
- Rubber Grommets: To protect wires that pass through metal surfaces.
- Instruction Manual: Specific to your camera model, for reference.
Each RV model may need different tools. Check the manual to confirm. Once you have all these, you’re ready to start the installation.
Step-by-Step Installation Process
Installing an RV rear camera can be straightforward. Follow these steps and get it right.
- Choose the Mounting Location: Find the best spot for the camera. It should give a clear, wide view. Above the license plate or on the RV roof are common choices.
- Mount the Camera: Secure the camera using screws. If drilling, apply silicone sealant afterward to prevent water entry.
- Route the Cables: Lead wires from the camera to the monitor location. Use cable ties for a tidy setup. Rubber grommets protect wires passing through metal.
- Install the Monitor: Place the monitor in your driving area. Ensure it’s secure and won’t obstruct the view.
- Connect the Wires: Follow the instruction manual closely. Crimp and strip wires as necessary. Connect the power wires to a stable source.
- Seal the Connections: Apply electrical tape around connections. Ensure everything is insulated to prevent short circuits.
- Test the System: Before finalizing the install, test the camera. Check the monitor for a clear view and adjust if needed.
- Finalize Installation: Once everything works, finalize the setup. Clean up wiring and ensure all screws are tight. Add fuse taps for a neater look.
By following these steps, you can install an RV rear camera confidently. This added feature will bring enhanced safety to your travels.
Wiring and Power Considerations
When installing an RV rear camera, wiring and power are crucial steps. Proper wiring ensures your camera works well. Safe power connections protect your RV’s electrical system. Here are key points to consider:
- Power Source: Connect your camera to a reliable power source. Often, this is the reverse light circuit or a dedicated RV camera outlet.
- Cable Routing: Plan the routing of cables from the camera to the monitor. Avoid areas that may pinch or damage wires.
- Connections: Secure all electrical connections. Crimping connectors is better than twisting wires. Use electrical tape to wrap them.
- Wire Protection: Use conduits or cable wraps to protect exposed wires. This guard against weather and wear.
- Grounding: Ensure the camera system is properly grounded. This reduces the risk of electrical faults.
- Voltage Check: Use a voltmeter to test connections. Correct voltage means your camera will function correctly.
- Fuse Tap: Install a fuse tap for camera power. This helps avoid overload on your RV’s electrical system.
By paying attention to these power and wiring tips, your camera installation will be safe and durable. Always double-check your work for the best results.
Testing and Troubleshooting the RV Rear Camera
After installing your RV rear camera, it’s crucial to test it to ensure functionality. Here are some steps to help you with testing and troubleshooting:
- Power the System: Turn on your RV and engage the reverse gear. This should activate the camera.
- Check the Monitor: Look for the camera’s feed on the monitor. You should see a clear view of the area behind your RV.
- Adjust the Camera Angle: If the view isn’t optimal, adjust the camera angle. Aim for maximum visibility with minimal blind spots.
- Inspect for Glitches: Keep an eye out for any flickers or interruptions in the feed. These could indicate a wiring issue.
- Review Night Vision: If your camera has night vision, test it in low light conditions. Ensure the image is still clear.
- Listen for Sound: Test any built-in microphones by making noise near the camera. It should pick up the sound if it’s working.
If you encounter problems, here are some troubleshooting tips:
- Check Connections: Loose or incorrect wire connections are common issues. Tighten and secure all connections.
- Power Source Issues: Confirm that the camera’s power source is consistent. Check the fuse if there’s no power.
- Damaged Wires: Inspect the wires for any damage. Replace them if you find cuts or tears.
- Obstructed Camera Lens: Clean the lens if the image is blurry. Dirt or residue can obstruct the view.
- Monitor Settings: Adjust the settings on the monitor. Brightness or contrast could be affecting the image quality.
Using this guide, you can test and troubleshoot your RV rear camera effectively. It’ll help in maintaining a functional and reliable system.
Maintenance Tips for RV Rear Cameras
Keeping your RV rear camera in top condition is important for ongoing safety and performance. Here are easy-to-follow maintenance tips:
- Regular Cleaning: Dirt and grime can obscure the camera’s view. Wipe the lens gently with a soft, clean cloth.
- Check for Water Damage: Inspect the camera housing for signs of water ingress. Reseal with silicone if needed.
- Secure Wiring: Ensure cables and connections remain secure. Tighten any loose fittings and replace worn parts.
- Test Functionality: Regularly test the camera to catch any issues early. Adjust settings as needed for best view.
- Update Software: If your camera system has software, keep it updated. Check for updates from the manufacturer.
- Avoid Harsh Chemicals: When cleaning, use mild detergents. Harsh chemicals can damage the camera’s components.
By performing these simple maintenance tasks, your RV rear camera will provide reliable service for years to come.