Introduction to RV Rear View Cameras
Rear view cameras for RVs boost safety and convenience on the road. These devices help drivers see what’s behind their large vehicle when reversing or driving. This makes parking and navigating through tight spots easier. The RV rear view camera acts as an extra eye. It can prevent accidents and damage to your vehicle.
Benefits of Using an RV Rear View Camera:
- Enhanced Safety: Offers a clear view of the rear, reducing blind spots.
- Improved Maneuverability: Assists with difficult parking and driving situations.
- Accident Prevention: Helps to avoid collisions with objects, animals, or people.
- Convenience: Gives peace of mind during travel, especially in unfamiliar areas.
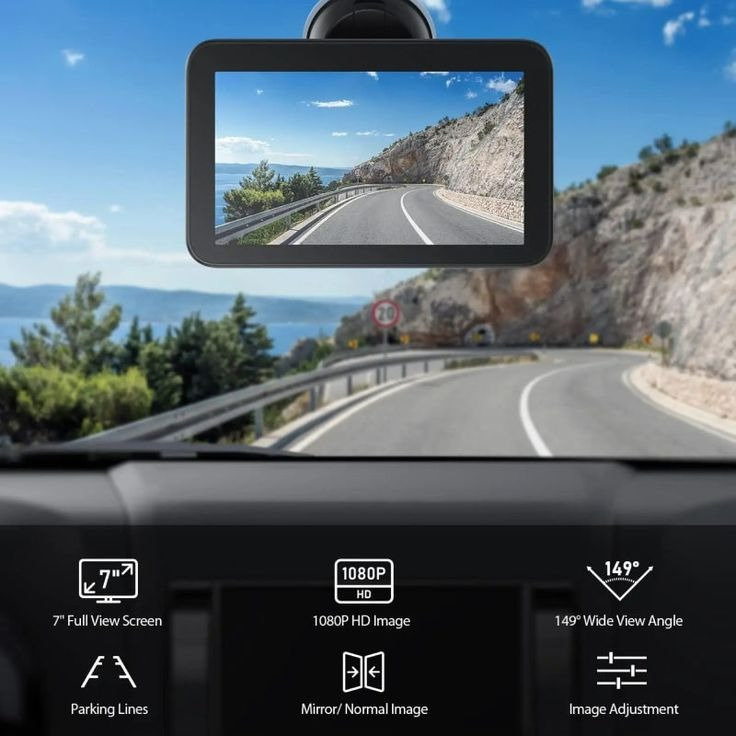
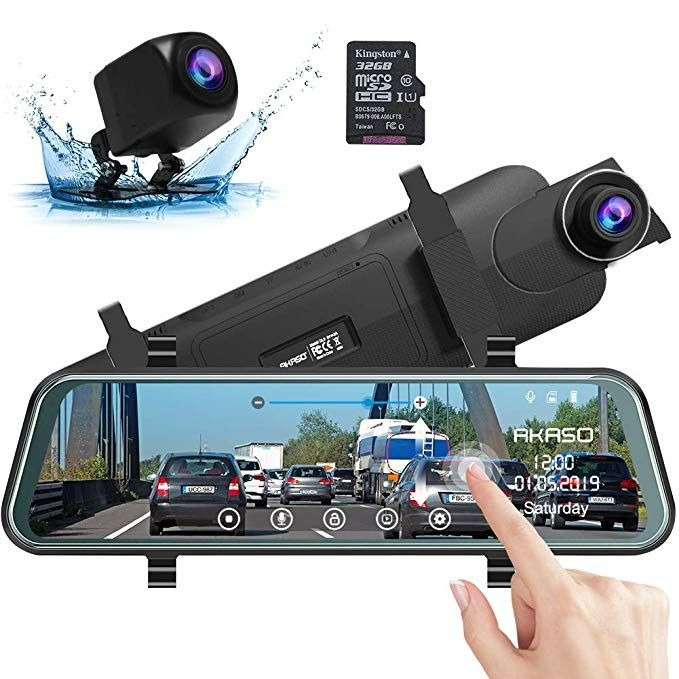
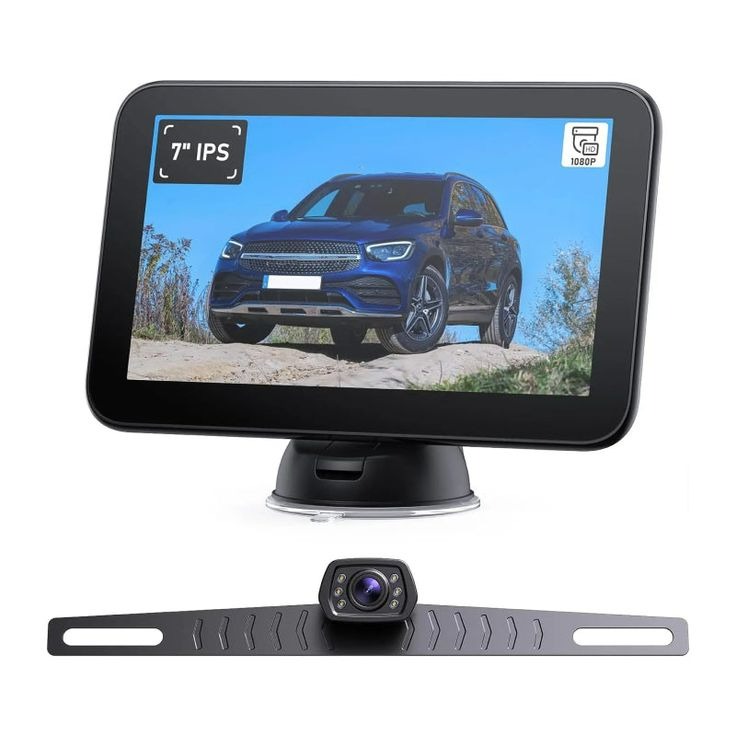
There are different types of RV rear view cameras. Some come with night vision; others have motion sensors or multiple lenses. Your choice depends on your RV type and personal preferences. Features like wide angle views and high-resolution screens make driving and reversing your RV safer and more comfortable. In the following sections, we will discuss what you need to install an RV rear view camera, how to pick the right one, and the detailed steps for installing your camera successfully.
Tools and Materials Needed for Installation
To begin installing your RV rear view camera, gather the necessary tools and materials. Proper preparation ensures a smooth installation process.
- Screwdriver set: For opening compartments and securing mounts.
- Drill and drill bits: To make holes for mounting the camera and running cables.
- Wire strippers and crimping tool: Essential for handling electrical connections.
- RV rear view camera kit: Includes the camera, mounting hardware, and cables.
- Silicone sealant: To weatherproof any exterior holes you create during installation.
- Cable clips or conduit: To organize and protect the wiring.
- Electrical tape: For insulating connections.
- Zip ties: To secure cables along the RV’s body without drilling additional holes.
- Voltmeter: To test electrical connections.
Make sure you have all these items on hand before starting. As you gather your tools, consider a workspace that is well-lit and free from distractions. Safety should always be your top priority. Wear protective gear, like gloves and safety glasses, to guard against injury.
Choosing the Right RV Rear View Camera
Selecting the right RV rear view camera is crucial. It ensures your system meets your travel and safety needs. Here are steps to help you choose the best camera for your RV.
Identify Your RV’s Specific Needs
Think about your RV size and design. Larger RVs may need cameras with wider angles. Consider your driving habits as well. If you drive at night often, look for cameras with night vision.
Look for Key Features
Key features can include wide-angle lenses and high-resolution displays. These improve visibility and safety. Also, consider cameras that offer weather-resistant construction and automatic motion detection.
Decide on Wired or Wireless Systems
Wired cameras have reliable connections but require more installation work. Wireless systems offer easier installation but may have signal interference.
Check Compatibility with Your RV
Ensure the camera system works with your RV’s power system and mounting points. It should integrate well with any existing screens or systems you have.
Read Reviews and Compare Prices
Look at customer reviews for insights on performance and durability. Compare prices to find a camera that fits your budget without sacrificing quality.
Preparing for Installation: Location and Angle
Before you start installing your RV rear view camera, identifying the right location and angle is key. This ensures you get the best possible view and functionality from your camera. Here’s how to prepare effectively:
- Determine the Optimal Position: The camera should capture a wide view of the area behind your RV. Common placement includes high up on the back of the RV, typically near the clearance lights.
- Ensure a Clear View: Check that the chosen spot is free from obstructions. Avoid placing the camera where it might get blocked by bike racks or luggage carriers.
- Consider the Camera Angle: The angle of the camera is important for visibility. It should allow you to see the ground near the bumper as well as the horizon for a comprehensive view.
- Keep Wiring in Mind: Think about how you will run cables from the camera to the display inside your RV. The location should allow a practical routing path.
After selecting the best spot for your camera, mark the area. Use a pencil or masking tape to outline the spot where you will mount the camera. Doing so helps you visualize the installation and plan for the next steps. With the location and angle set, you’re ready to move on to the installation process.
Step-by-Step Installation Process
Now that you have your tools, camera, and location ready, let’s start the installation. Follow this step-by-step guide to ensure a proper setup of your RV rear view camera. Each step is designed to be simple and easy to follow.
- Mount the Camera: Use the screwdriver to secure the camera mount to the RV. Do this at the spot you marked earlier. Make sure it’s firm and stable.
- Drill Holes for Cables: Carefully drill a hole to run the camera’s power and video cables. Be sure to seal the hole with silicone to prevent leaks.
- Run the Cables: Direct the cables from the camera to the RV’s display. Use cable clips or conduit to keep the wires organized and protected as you guide them inside.
- Make Electrical Connections: Connect the camera to the power source using the wire strippers and crimping tool. Always test connections with the voltmeter.
- Attach Display Monitor: Secure the monitor in a spot where it’s easy to see while driving. Connect the video cable to it.
- Seal and Secure Everything: Check that all mounts and cables are firmly in place. Use silicone sealant and zip ties to finalize the installation.
- Clean the Area: Tidy up your workspace by removing debris and tools. Clean the camera lens and monitor for a clear view.
By following these simple steps, your RV rear view camera should be ready for use. Don’t rush the process. Take the time to ensure each connection is secure and every component is properly mounted. This care will help you avoid issues and give you confidence in your new rear view camera system.
Wiring and Power Connections
Having secured the camera and run the cables, it’s time to focus on the wiring and power connections for your RV rear view camera. These steps are critical for ensuring your camera functions correctly and reliably.
- Disconnect RV Battery: Before handling any wiring, disconnect the RV battery. This prevents electrical accidents.
- Route the Power Cable: Take the camera’s power cable and route it to your RV’s power source. Use cable clips to secure the cable along the way.
- Connect to Power Source: Use wire strippers to expose the ends of the power cable. Connect these using a crimping tool to your RV’s power source.
- Ground the Camera: Ensure the camera has a good ground connection. Attach the ground wire to a metal part of your RV’s frame.
- Connect to the Display: Run the video cable from the camera to the display monitor. Secure connections with electrical tape.
- Reconnect the RV Battery: Once all connections are secure, reconnect your RV’s battery.
- Test the Connections: Turn on your RV and monitor to check the camera’s functionality. Ensure there are no loose connections.
- Secure the Wiring: Once verified, use zip ties to neatly secure any loose cables and ensure they are away from any moving parts.
By following these steps, you’ll establish a reliable power connection for your RV rear view camera, making your travels safer and more secure. Keep in mind, precise and secure connections are crucial for the camera’s performance.
Testing and Troubleshooting Your RV Camera
After installing your RV rear view camera, test and troubleshoot to ensure it works well. Here’s a simple guide:
- Power On the System: Start by turning on your RV and the camera system. Check the display monitor to see if the camera view is clear.
- Adjust the Angle: If the view is off, adjust the camera angle. Aim for a view that includes the bumper and the horizon.
- Inspect for Interference: Sometimes, wireless systems can have signal interference. Look for static or choppy video. If present, reposition the receiver or address any obstructions.
- Check Connections: If the camera doesn’t turn on, double-check all connections. Ensure they are tight and properly insulated.
- Test in Different Conditions: Try out the camera during the day and at night. Also, test while driving to assess the system’s stability.
- Consult the Manual: For specific problems, consult the camera’s user manual. It often contains troubleshooting tips.
- Seek Professional Help: If problems persist, don’t hesitate to contact a professional. They can identify and fix complex issues.
Regular testing and timely troubleshooting can prevent major setbacks during your travels. Ensure your RV rear view camera is always in top condition for safe and stress-free adventures.
Maintenance Tips for RV Rear View Cameras
Proper maintenance is vital for the longevity and performance of your RV rear view camera. Follow these tips to keep your camera in peak condition:
- Regular Cleaning: Wipe the camera lens gently with a soft, clean cloth. Remove dirt and debris.
- Check Connections: Inspect the wiring and connections periodically for signs of wear or corrosion.
- Test Functionality: Regularly test your camera to ensure it’s working correctly.
- Protect from Elements: When not in use, protect your camera from harsh weather to prevent damage.
- Update Software: If your camera has software, look for updates to improve functionality and security.
- Consult the Manual: Refer to your camera’s user manual for specific maintenance instructions.
- Prompt Repairs: Address any issues immediately to prevent further damage to the system.
Taking care of your RV rear view camera will enhance its reliability and help avoid accidents or damage during your travels. Stick to a maintenance routine and enjoy the convenience and safety it offers on the road.