Introduction to Car Rear Cameras
Car rear cameras have become a must-have for safe driving. They help drivers reverse with more confidence. A clear view of what’s behind the car is provided. These devices reduce blind spots significantly. They are also known as backup or reverse cameras.
Installing a car rear camera can seem daunting. But with the right information, it can be straightforward. In the following sections, we will cover all the steps. We aim to guide you through the process smoothly.
A rear camera’s benefits are numerous. It increases safety and can even help with parking. Many new vehicles now come with these cameras. Yet, it is possible to install one in older models too. Understanding how they work is the first step. Next, you will learn what tools and materials you need.
Throughout this guide, remember to keep ‘car rear camera’ in your thoughts. This guide is tailored to help you with every aspect of the installation. From choosing the right camera to maintenance tips, we’ve got you covered. Let’s dive into the world of car rear cameras and enhance your vehicle’s safety.
Essential Tools and Materials Needed
To install a car rear camera, you need the right tools and materials. This ensures a smooth installation process. Here’s a list of essential items you might need:
- Screwdrivers: A set of screwdrivers is crucial. You’ll need different sizes for various screws during the installation.
- Wire strippers and cutters: These tools help you handle the wiring part. Be sure to practice safety when dealing with wires.
- Power drill: If you need to make new holes for the camera, a drill is necessary.
- Soldering iron and solder: For a secure connection, you might solder some wires.
- Electrical tape and heat-shrink tubing: To protect the wire connections.
- Multimeter: This helps you test the electrical connections for the car rear camera.
- Camera kit: It should include the camera, wiring, and mounting hardware.
- Vehicle manual: Helps locate the best spots for placement and connection points.
Gather these tools before you start. It saves time and helps you stay organized. Prepare a clean workspace. This will keep everything within reach and prevent losing small parts. With these tools and materials, you’re ready to install your car rear camera. Next, we’ll go through choosing the right camera for your vehicle.
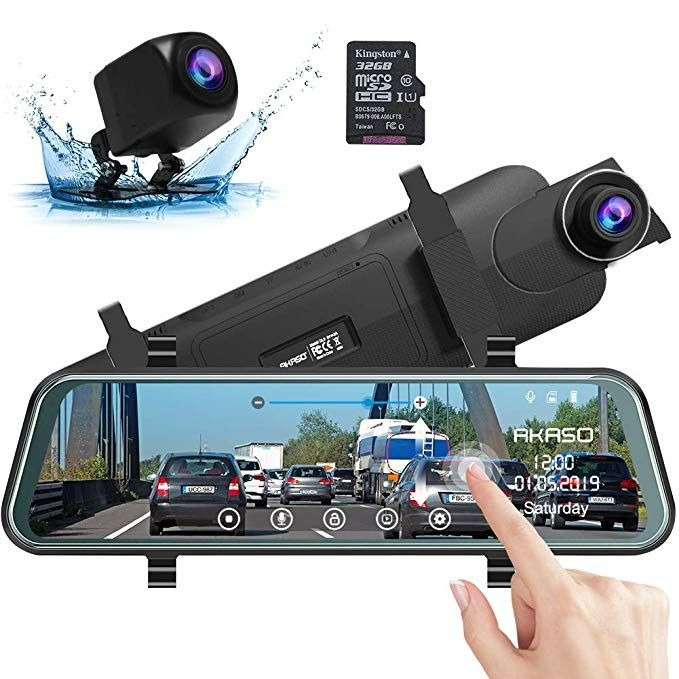
Choosing the Right Rear Camera for Your Vehicle
Selecting the appropriate car rear camera for your vehicle is important. Here’s what to consider during the selection:
- Compatibility: Ensure the camera fits your car model. Check the manufacturer’s specification.
- Camera Quality: Look for high-resolution cameras. They provide clearer images that aid safer reversing.
- Night Vision: A night vision feature is essential. It improves visibility during low-light conditions.
- Field of View: Wider angles capture more area behind your car. Typically, a 170-degree angle is good.
- Parking Guidelines: These are on-screen lines. They help during parking by showing the car’s pathway.
- Wired or Wireless: Decide between the two types. Wired cameras are more reliable, while wireless offer easier installation.
- Price: Set a budget, but remember that quality matters. Don’t compromise safety for cost.
- Durability: The camera should withstand weather and road conditions. Look for waterproof and shock-resistant features.
- Brand Reputation and Reviews: Research brands and read customer reviews. It ensures you buy a reliable product.
Take time to find the right car rear camera. It’s not just about the cost, but safety, compatibility, and added features. Once you choose the right camera, you’re set for the next steps. That is preparing for the installation and the installation process itself.
Pre-Installation Preparation
Before you begin the actual installation of the car rear camera, there are some preliminary steps you should take. This preparation ensures a smoother process and helps you avoid common pitfalls.
- Familiarize with your vehicle: Read the vehicle manual carefully. Understand where the license plate lights are and where to route the wires. Each vehicle is unique, and the manual can offer valuable specifics.
- Choose a location for the camera: Decide where you want to place the camera. Most drivers opt for near the license plate for a central view.
- Disassemble necessary parts: You may need to remove parts of your car, like the trunk lining or license plate light. Do this gently to avoid damage.
- Ensure the camera’s power source: Identify where to connect the power. It should be a source that activates when you put the car in reverse.
- Check all tools and materials: Make sure you have all the essential tools and materials listed in the previous section. Missing something can delay your installation.
- Prepare your workspace: Find a well-lit, clean, and dry area to work. Lay out your tools and materials for easy access.
- Get help if needed: Installing a car rear camera can be a two-person job. If you’re not confident doing it alone, ask someone to assist you.
Completing these steps will lay the foundation for a successful installation. Keep your focus on safety and precision as you move to the next stage, where you’ll start the physical installation of your car rear camera.
Step-by-Step Installation Process
Now that you have chosen your car rear camera and prepared all necessary tools and materials, let’s start the step-by-step installation process. These steps are designed to guide you through the installation to ensure a smooth and secure setup. Remember that safety is paramount, so take your time to follow each step carefully.
- Mount the Camera: Position the camera near the license plate for the best view. If drilling is required, mark the spot first and then use the power drill. Secure the camera with the mounting hardware provided in the kit.
- Route the Wires: Run the cables from the camera to the front of the vehicle. Hide the wires behind trim panels and under the carpet for a clean look. This may require some disassembly of your vehicle’s interior.
- Connect to Power: Attach the camera’s power wire to your vehicle’s reverse light power wire. This ensures the car rear camera activates when you shift into reverse. Use wire strippers, solder, and electrical tape for a solid connection.
- Attach the Video Cable: Connect the camera’s video cable to the display monitor in the front. Ensure the connection is tight and secure. Route the cable carefully to avoid any pinching or damage.
- Reassemble the Vehicle: Once all the wires are properly routed and connected, reassemble any interior parts you removed. Replace the trunk lining, panels, and any other parts gently to avoid breakage.
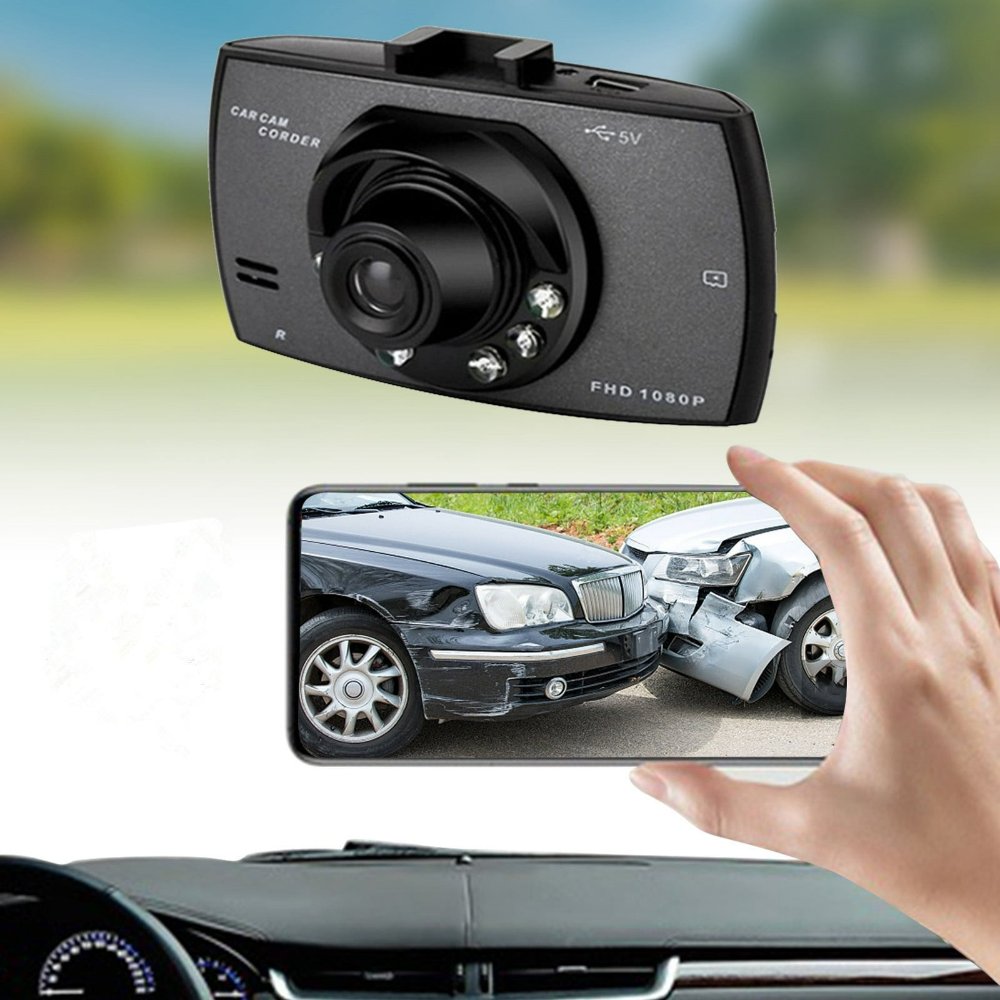
- Test the System: Before fully securing the camera and finalizing the installation, test the camera to ensure it’s working. Put the vehicle in reverse to see if the camera activates and the display shows a clear image.
By following these steps, you should have a fully functional car rear camera installed. However, if you encounter any issues, refer to the ‘Testing and Troubleshooting’ section for assistance. Remember, take your time and ensure each connection is secure for the best results.

Wiring and Connecting the Rear Camera
With the car rear camera mounted and preliminary steps completed, next is wiring and connection. This is a critical stage where precision is key. Here’s how to wire and connect your car rear camera properly:
- Locate the Reverse Light Wire: This wire turns on when you engage reverse. Connecting here ensures the camera activates during reversing.
- Connect the Power Wire: Use your wire strippers to expose some of the reverse light wire. Twist your camera’s power wire to it. Secure these together with solder and cover with electrical tape.
- Run the Video Cable: This transmits the camera feed to your display screen. Route this cable from the rear to the front of your car. Go beneath trim panels and carpets to hide it well.
- Connect to the Display: The video cable’s end plugs into the display. Check your vehicle manual for the display’s input location. Push the connector in until it clicks.
- Earth the System: Ground the camera by connecting its earth wire to a metal part of the car’s frame. This reduces interference and ensures a clear image.
Ensure you handle all wires with care to avoid injury or damage to the vehicle. This stage requires patience. Double-check all connections for a reliable car rear camera system. After this, you are ready to test and troubleshoot your installation.
Testing and Troubleshooting
After installing your car rear camera, testing and troubleshooting are crucial steps. They guarantee your camera works perfectly. Here’s how to do it effectively:
- Turn on the vehicle: Start your car, but keep it in park. This action provides power to check the camera.
- Engage reverse gear: Shift your car into reverse. The car rear camera should activate now. If not, check power connections again.
- Inspect the display: Look for a clear image on the display. If the image is blurry or not appearing, check the video cable connections.
- Check for distortions: If you see lines or distortions, ensure the camera is grounded correctly. A poor earth might be the problem.
- Adjust the angle: The camera may require angle adjustments for the best view. Move it until the rear view is satisfactory.
- Test in different lights: Test the camera in daylight, twilight, and at night. Make sure the night vision works well.
- Use guidelines: If your camera has parking guidelines, they should appear on the display. They must align with the real-world space behind your vehicle.
- Secure the setup: Once everything works, secure the camera and wires. Use more electrical tape or zip ties for this task.
If problems persist, consult the camera manual or seek professional help. Remember, safety is key. Ensure every part of the car rear camera system functions before heading out on the road.
Maintenance Tips for Car Rear Cameras
Maintaining your car rear camera is crucial for its longevity. Regular checks and cleanings will ensure it continues to provide clear visibility. Here are essential tips to keep your camera in top condition:
- Regular Cleaning: Dirt and debris can obscure the camera’s view. Use a soft cloth to gently clean the lens. Avoid harsh chemicals that might damage the lens coating.
- Check Wiring: Periodically inspect the wiring. Look for any signs of wear or damage. If any wires are exposed, cover them with electrical tape to prevent short circuits.
- Waterproofing: Ensure the camera remains waterproof. Check the sealing around the camera housing. If it’s compromised, reseal it to prevent moisture entry.
- Monitor Camera Performance: Pay attention to the camera’s performance. If you notice any changes in image quality, investigate potential causes immediately.
- Consult the Manual: If troubleshooting is required, refer to the camera’s manual. It can provide specific instructions for caring for your model.
- Schedule Professional Inspections: Consider having a professional check your car rear camera system annually. They can catch issues that you might miss.
By following these maintenance tips, your car rear camera will function reliably. This will not only ensure clear footage but also provide peace of mind while driving.